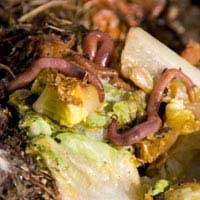
How to Use Composting Worms

Did you know that the majority of organic waste can be recycled by worms?You can create your own worm composting system which will be able to change up to 70% of your household waste into compost which will benefit your garden and lawn.
How to make a worm composting bin
To make a worm composter, you’ll need:- A short, wide plastic bin
- A drill
- Sand/gravel
- Damp, shredded newspaper or straw (for bedding material)
- Compost worms. You need 1,000 to 2,000
Step one: First you need to drill a holes in the bottom and top of the bin.
Step two: Put up to 10cm of gravel (or sand) in the base of the bin..
Step three: Next, add some of the bedding material (Newspaper or straw).
Step four: Put the worms in a space in the bedding material and add some more bedding on top.
What next?
You can keep the worm composting bin outside but if the temperature drops below 40ºFahrenheit, you’ll need to bring the bin inside. You can keep it in a shed or garage, for example.Worms can eat foods such as:
- Used coffee grounds and tea bags
- Fruit and veg, and their peelings (Not cooked potatoes)
- Cereal
- Bread
- Leaves
- Horse/cow manure
- Egg shells
They can’t eat foods such as:
- Meat
- Fish
- Oily foods
- Dairy
- Rice/pasta
- Grass
- Potatoes
- Cat/dog faeces
You need to distribute the food within the worm bedding. Feed the worms gradually at first. Don’t add more food waste until the previous food has almost all gone. You may need to experiment with the number of worms if you are generating a lot of food waste.
As the bin generates new worms, you’ll be able to add more food.
After around 10 weeks, you’ll be able to remove the finished compost and add it to your garden. Firstly, shift the finished compost to one side of the bin and on the other side where the new space is, add fresh bedding and food waste. Once the worms move over to the clean bedding, you’ll be able to harvest the finished compost.


Re: Minimising Food Waste: Composting
Kak esehiko sminor k112 greenusesforwaste.co.uk
Re: How Do I Dispose of My Broken Fridge Freezer?
I have paid to the council to collect 2 Fridges. But they wanted to leave it in front of my house. I…
Re: How Do I Dispose of My Broken Fridge Freezer?
I have a American fridge freezer to get rid of
Re: How Do I Dispose of My Broken Fridge Freezer?
I have a chest freezer that needs removal NOT
Re: How Do I Dispose of My Broken Fridge Freezer?
I have two fridges to get rid of standard size
Re: How Do I Dispose of My Broken Fridge Freezer?
Unwanted Fridge freezer need to be removed. Thanks
Re: How Do I Dispose of My Broken Fridge Freezer?
i have a fridge freezer , not needwd anymore , who can i contact to pick up from Qurinidi nsw?
Re: How Do I Dispose of My Broken Fridge Freezer?
Need a fridge freezer uplifted got a new one
Re: How Do I Dispose of My Broken Fridge Freezer?
David - Your Question:Hi. I've got a small chest freezer in good working order I need someone to take it…
Re: How Do I Dispose of My Broken Fridge Freezer?
Hi. I've got a small chest freezer in good working order I need someone to take it away as I've just bought…